Where is the watermark?
Digital watermarking is often seen as a light but visible mark within an image, and can include a logo or URL to show copyright ownership. It is there for everyone to see (and remove). Invisible watermarks take this concept a step further and make the watermark less obvious and harder to remove. Digimarc is an invisible watermarking filter for Photoshop and is automatically included as a default. It is supported by a third party, Digimarc, and requires a subscription to take full advantage of it’s features. Its purpose is to embed an invisible watermark into an image to protect against copyright infringement and track the use of the image on the web. Digimarc works on two fronts. It embeds an invisible (strong) watermark into an image by encoding information (Author name and creation date) into a noise tolerant image’s least significant bits. That information is also stored in a database and can be cross-referenced against other copies of the same image all over the web. If an unauthorized use is discovered, the original author can prove who they are beyond any reasonable doubt and call out the infringing party.
I had a problem with copyright infringement of my own and thought Digimarc might be a perfect solution, but discovered that Digimarc’s service would not access the virtual world server where my texture images were stored. This roadblock inspired me to come up with my own type of invisible watermark using Photoshop to regain control over both the stored data, storage method, and file format. It is also important to note that the Digimarc filter can still be used to embed a second watermark into the same image if needed for distribution on the web.
Here are the steps I use for invisible digital watermarking in Photoshop:
- Give the original image a New Channel for encoding information. This converts it to a carrier file.
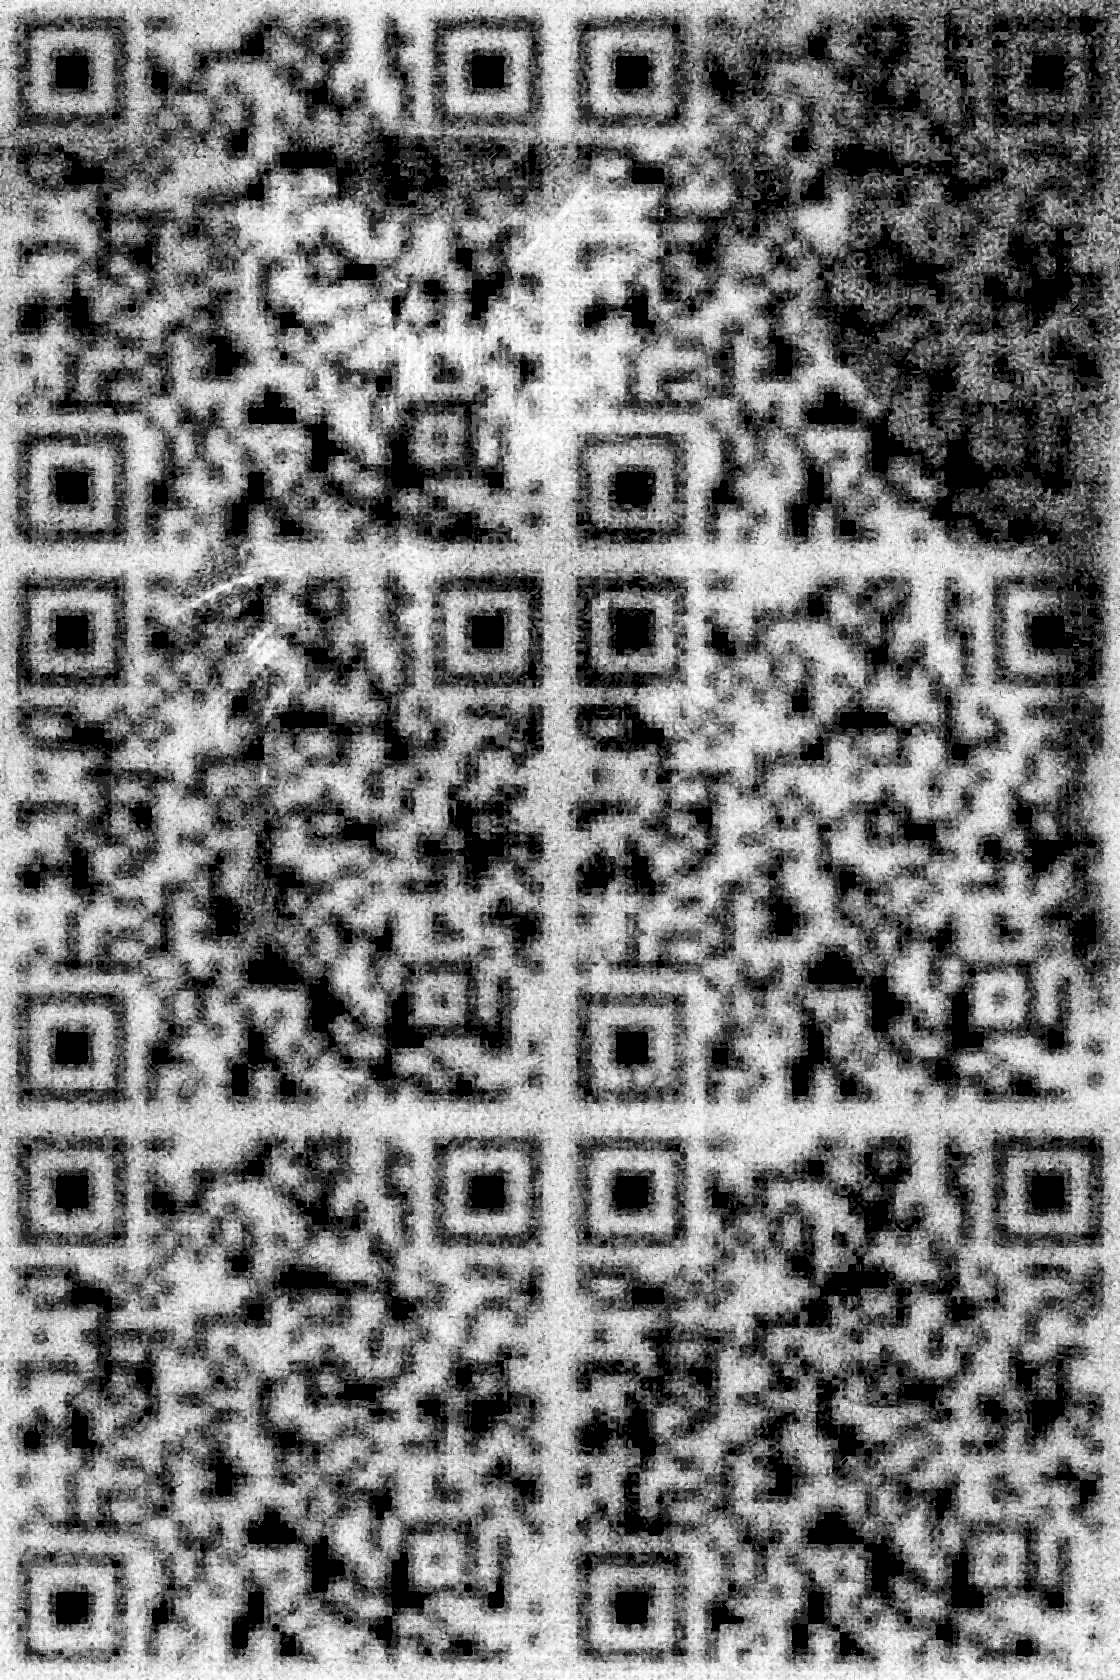
- Generate a second black and white image of the same dimensions and place multiple copies of a QR code in it. This is the information file which can carry contact information, a URL, or any message.
- Run a Gaussian Blur on the QR code to soften the edges so it will blend well with the carrier file image. Test this with a code scanner, then Copy and Paste it into the New Channel in the carrier file.
- Select part of the carrier image using the newly created Alpha Channel, Copy, then Paste it as a New Layer. This produces a second layer with only the coded portion of the image. It should be completely invisible at this point.
- To embed the code as imperceptibly as possible, run a Hue Saturation adjustment (altering the image hue by no more than five steps) and add 3% noise into the image with a noise filter. More alterations can be added if needed, but the general idea is to cover the coded layer with noise that uniformly alters the pixels slightly through all colors and shades.
- If the effect is too harsh the Opacity of the layer can be reduced to make the effects more subtle.
- Copy Merged, Paste the coded image into a New File, Flatten it and Save it to any popular file format (JPEG, PNG, Targa)
- Calculate the Difference between the original master file and the encoded file, Copy Merged, Paste into a New Layer. Run an Equalize adjustment on that layer to reveal the code again.
- To make the code readable under higher compressions, copy and compress the master file, then repeat steps 7-8.
This steganographic method may not be as sophisticated as Digimarc’s, but works for my application needs and gives a stealthy tracking mechanism for policing my work on a virtual world server hosting lossless JPEG 2000 file formats. It also survives moderate resizing, cropping, and compression. Best of all, it can be done entirely within Photoshop’s tool set without need of a third party add-on or a subscription.
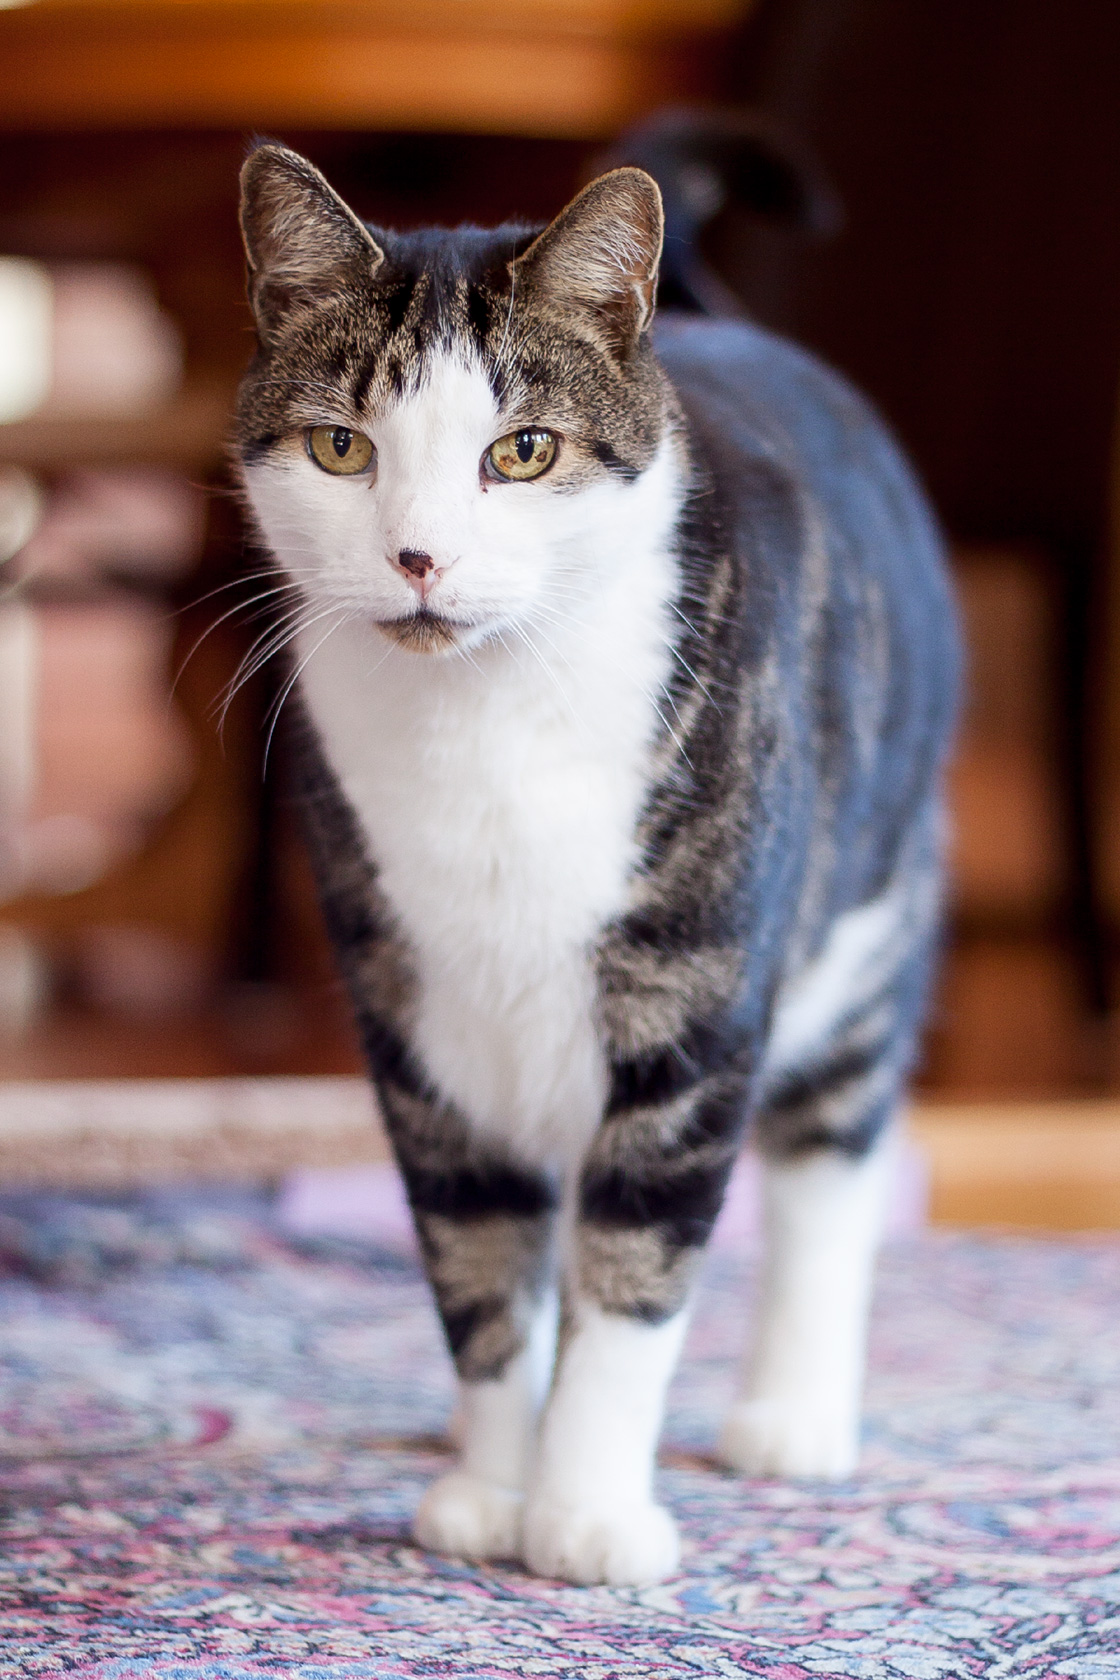
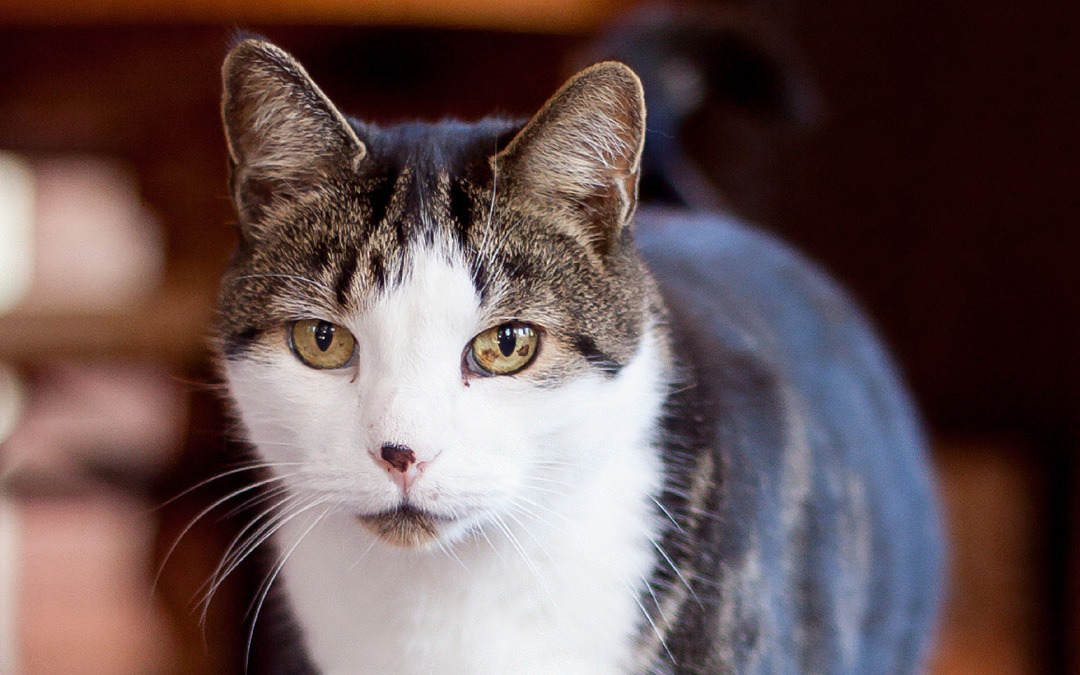
Cat image

Coded cat image
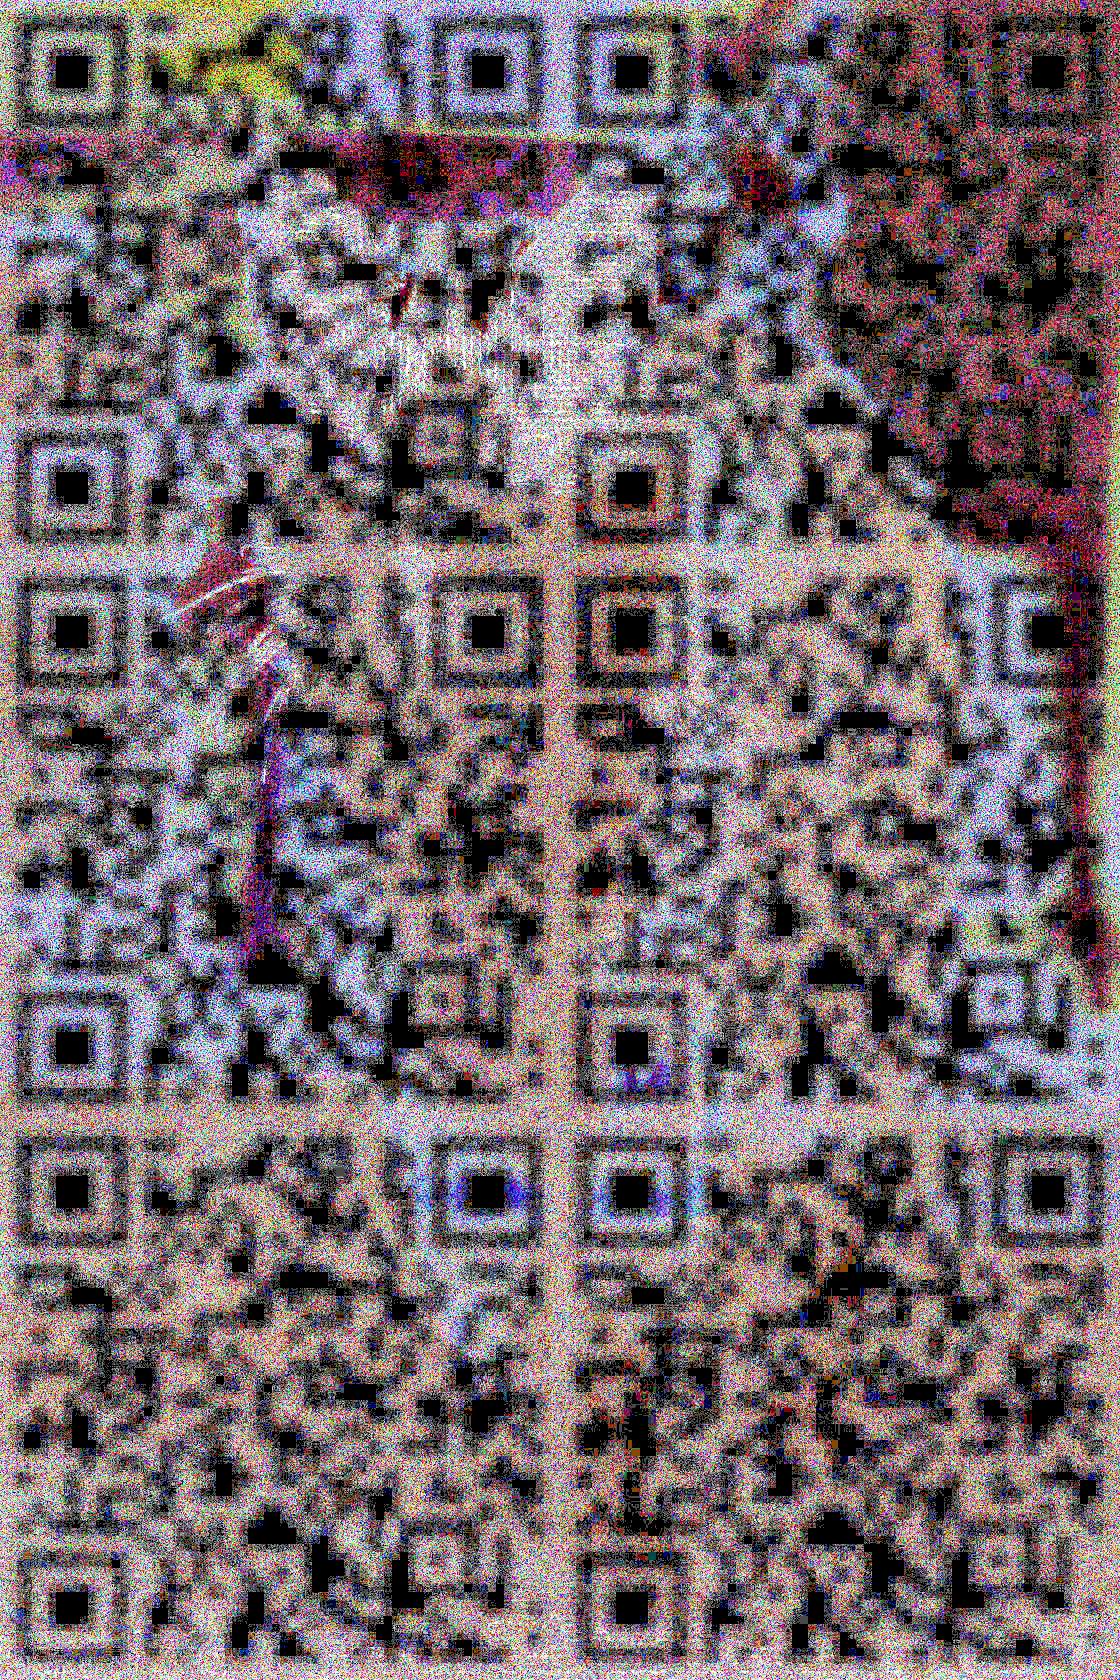
Raw extracted code